Ceptor Minimal Demo
- Kim Rasmussen
- Kim Rasmussen (Unlicensed)
- Kim Rasmussen (Unlicensed)
This describes how to setup and run the Minimal Ceptor Demonstration package.
What does this demonstrate
This demo shows using Ceptor Gateway to protect access to an application, it has the following functionality:
Web Application Protection
- End-user self registration
- Login using MFA (Multifactor Authentication)
- Allows end-user to choose between
- SMSOTP - One-Time Passwords sent using SMS/Text messages
- EmailOTP - One-Time Passwords sent using Email
- Mobile Authenticator (TOTP using e.g. Microsoft Authenticator or other mobile application)
- Allows end-user to choose between
- Registration of Authenticator Application
- Protection of existing Web Application or applications, requiring user to authenticate before being able to access the application
VPN Protection
- Radius Server for use with e.g. VPN allowing End-Users to choose between their registered 2nd factor methods and authenticate using MultiFactor
Installation
Download Ceptor from https://download.ceptor.io and install it.
The default installation
After installation, modify the file bin/pp_launcher.vmoptions and change the line
-Dceptor.launcher.xml=${installer:sys.installationDir}/config/ceptor_launch.xml
to the following:
-Dceptor.launcher.xml=${installer:sys.installationDir}/config/ceptor_minimal_launch.xml
This start this Minimal Demonstration instead of the default demo. Be sure to restart the Ceptor Service after this modification is completed.
Configuration
Initial setup
Once installed and , navigate your browser to https://localhost:4243/ to access Ceptor Console where you can view the status of the system and perform any required configuration changes.
Information about SSL certificates
Ceptor's default installation has a set of self-signed SSL certificates that you should replace with valid certificates for your hostname.
The file config/ceptor_minimal_launch.xml refers to a java keystore where the certificates are loaded from - this is by default ${ceptor.home}/ppserver/portalprotect.key and you should replace that with your own or import your own keys and certificates into it.
Your browser will display a certificate warning that you need to ignore until you have done this.
Changing default users and passwords
The default installation has the administration account admin and the password password that you need to use to login to the console. You should change the password immediately after installation.
To do this, select "Security Configuration" from the menu, and there you can manage the default accounts and update their passwords.
More information here: Access Control
Mail server configuration
After changing default users / passwords you should specify the correct email server to use - to do this, select "Configuration" from the menu, then "sessioncontrollers" and the group "email"
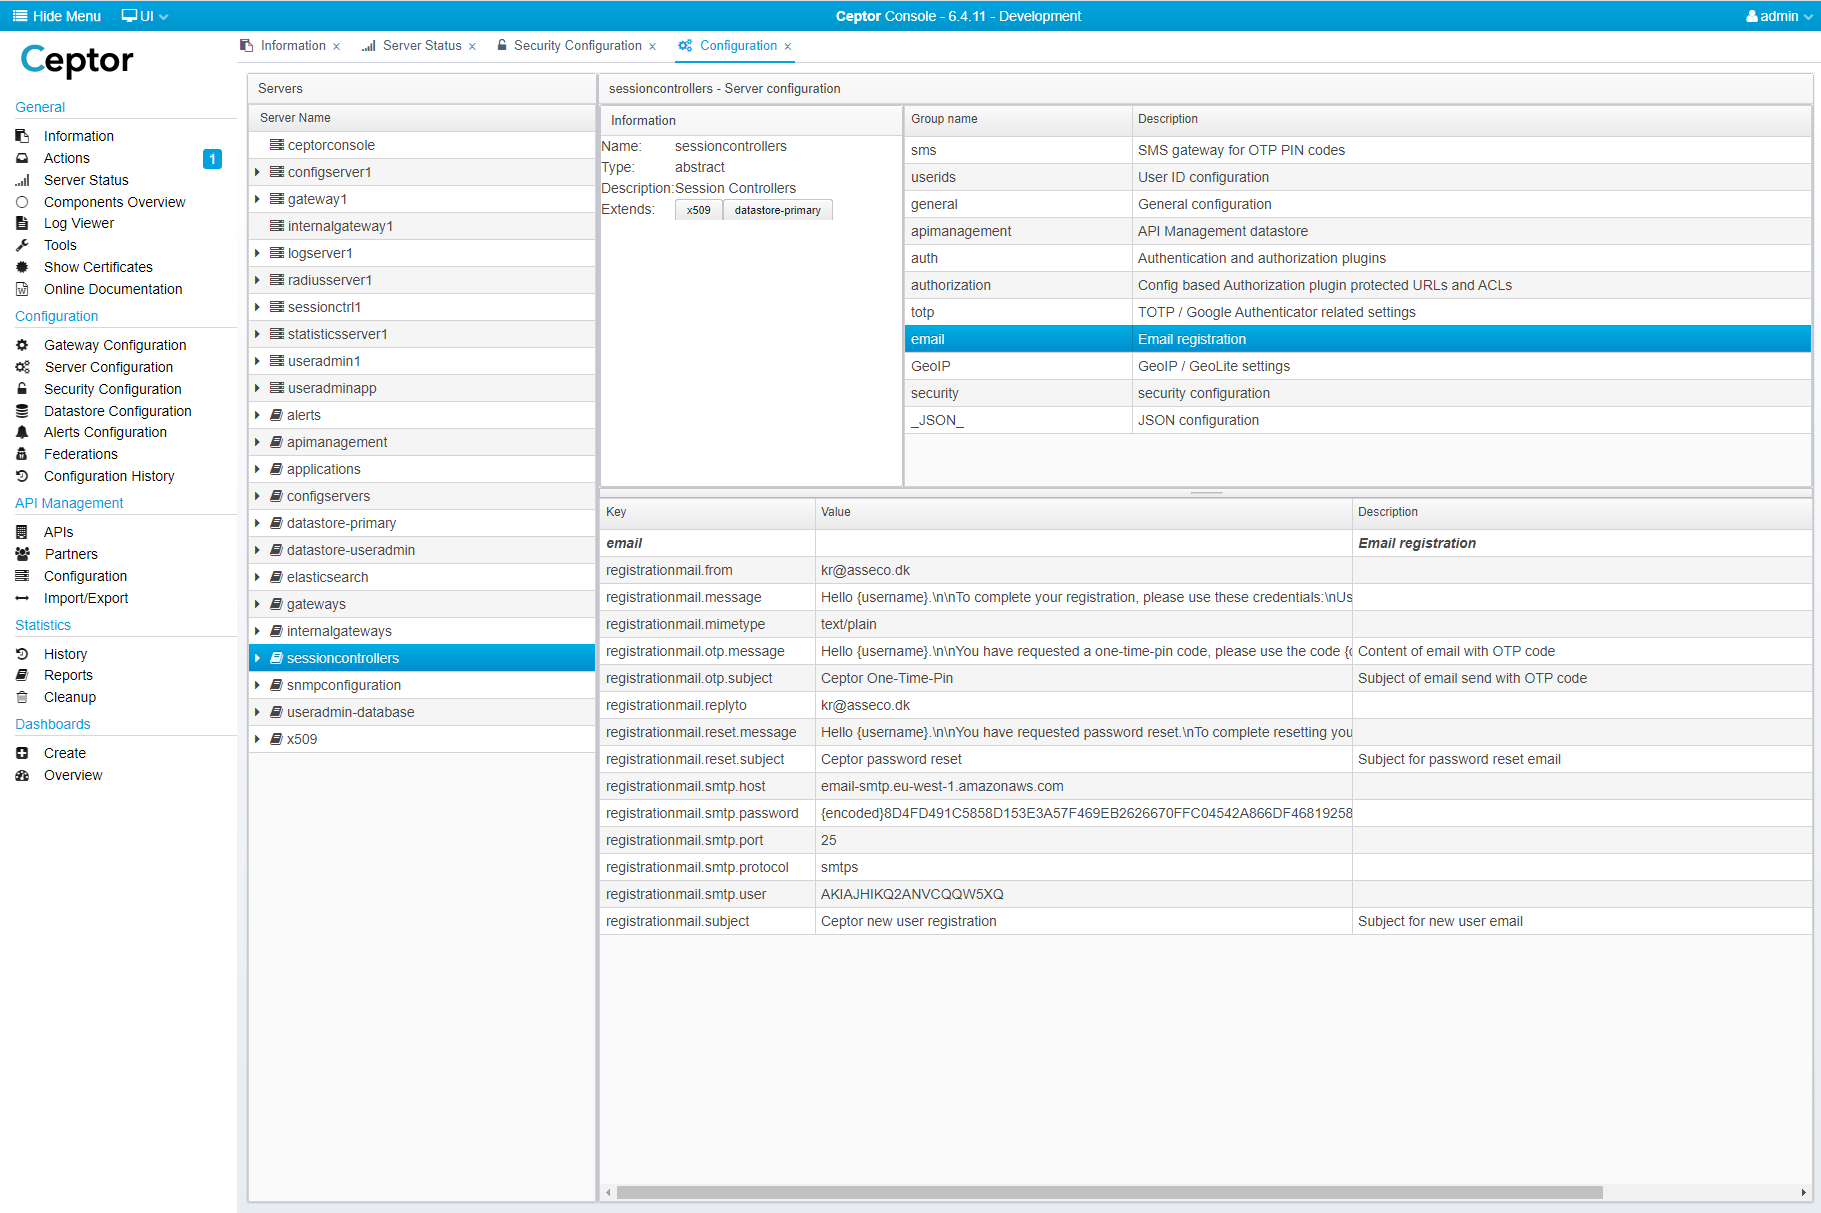
Here, change the following settings to match your environment:
| Name | Description |
|---|---|
| registrationmail.from registrationmail.replyto | Set the from and reply-to email addresses to match your setup |
| registrationmail.smtp.host | Hostname of your SMTP server |
| registrationmail.smtp.port | TCP Port number for your SMTP server, usually 25 or 465 |
| registrationmail.smtp.protocol | smtp for unencrypted traffic, smts for encrypted |
| registrationmail.smtp.user | Userid for authenticating to your mail server |
| registrationmail.smtp.password | Password for your mail server can optionally be encrypted, see Encrypting or Obfuscating Passwords and Tools for information about how to encrypt/obfuscate passwords using Ceptor Console |
You can find more information about the email authentication plugin and the other settings here: Email Authentication
SMS Provider Configuration
In the default configuration, Ceptor has a default demo account for sending SMS/OTP messages - you can use this initially for a few test messages, but you need to create and register your own account with one of the supported SMS Gateways.
Currently Ceptor has builtin support for either CPSMS or Unwire - CPSMS is easy to get started with, you can register here: https://www.cpsms.dk/demologin.php - after registration you will get an API Key that you need to configure within Ceptor.
From the Ceptor Console, select "Configuration" from the menu, then "sessioncontrollers and the group "sms".
| Name | Description |
|---|---|
| sms.apikey | Specify the API key you got from CPSMS |
For full details of available options, see SMS / Text OTP
Changing Ceptor Gateway Ports
Ceptor Gateway by default listens for traffic on port 8000 for unencrypted traffic and port 8443 for encrypted traffic. To change this, go the the menu and select "Gateway Configuration".
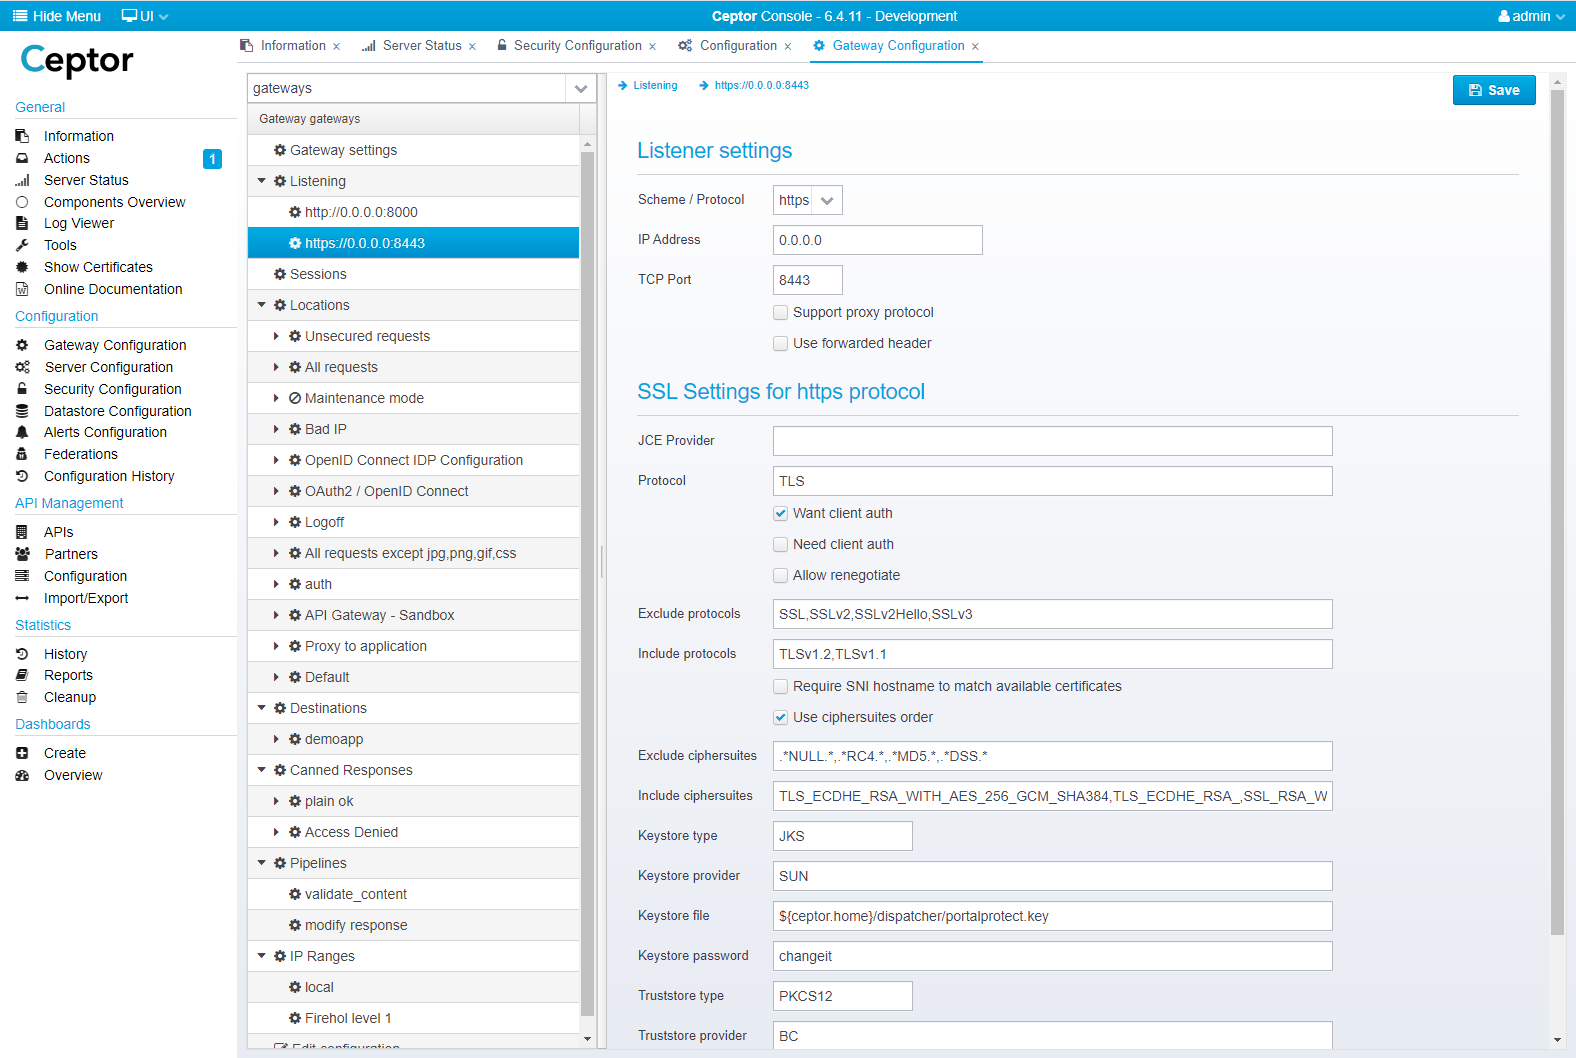
Here, select the "Listener" configuration you want to change and change port numbers and SSL certificates to suit your preferences.
For full details on all the available options, refer to Config - Listeners
Specifying a protected web server
By default, Ceptor assumes that you have a web server running at http://localhost:8080 that Ceptor Gateway will proxy traffic to once the user has authenticated.
To change this Go to the Gateway Configuration, and navigate to "Destinations", "demoapp" and "Targets"
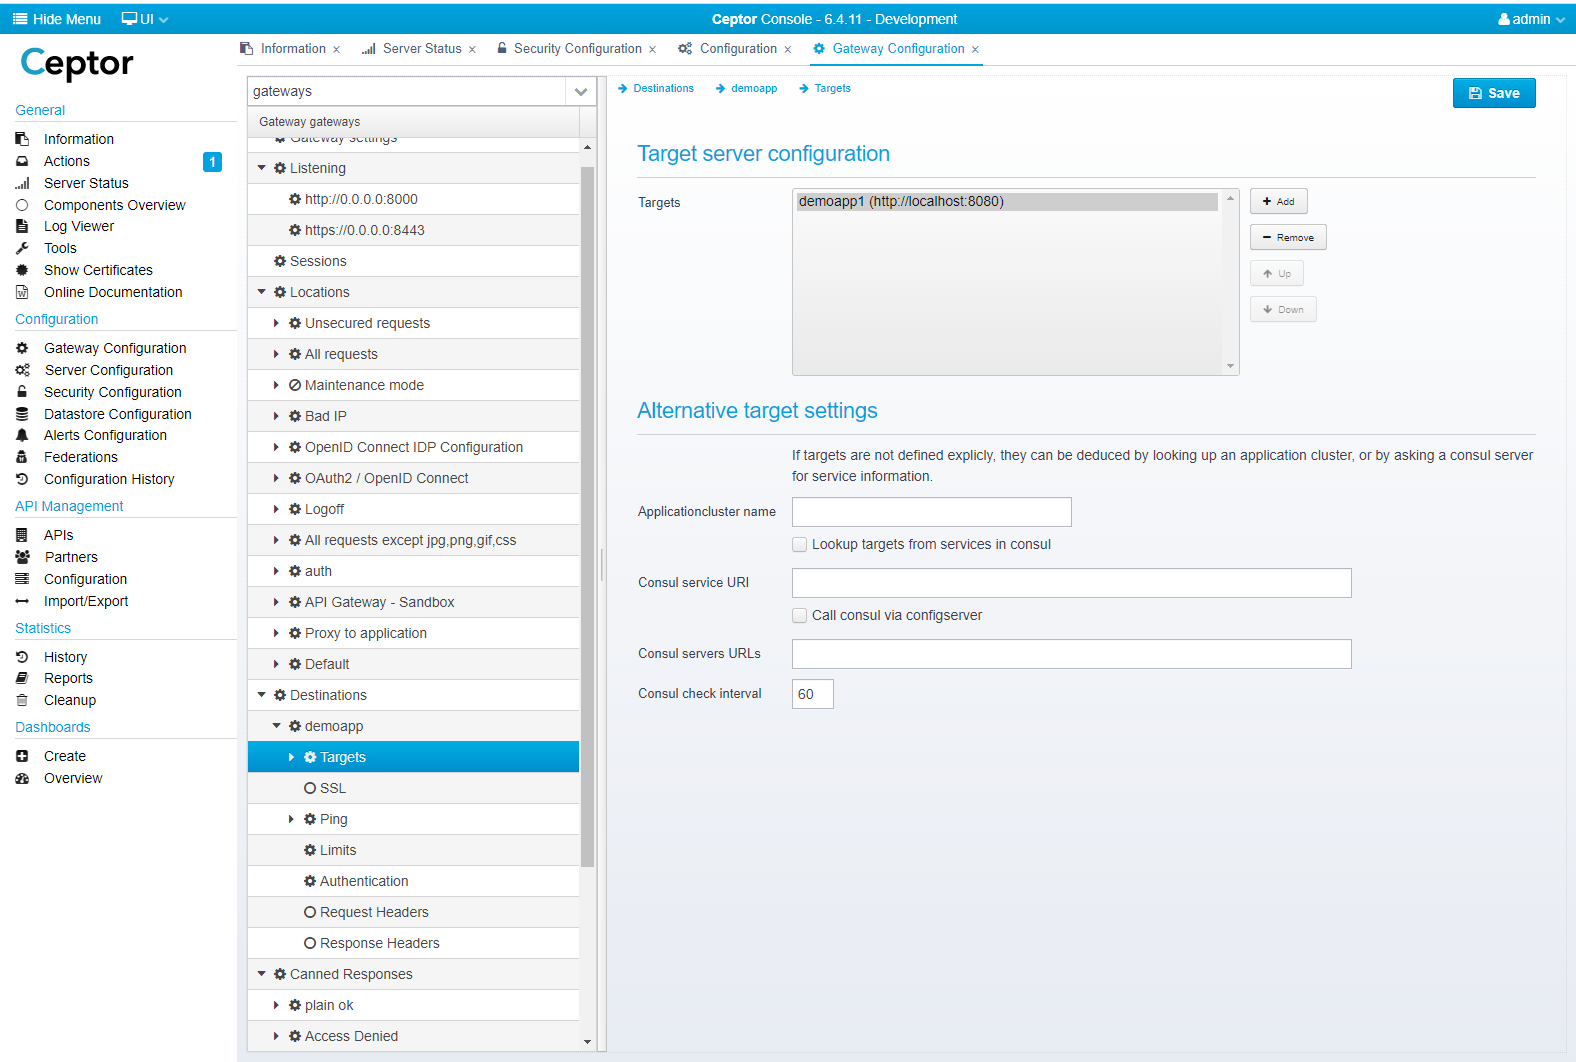
Here, you can point to another server.
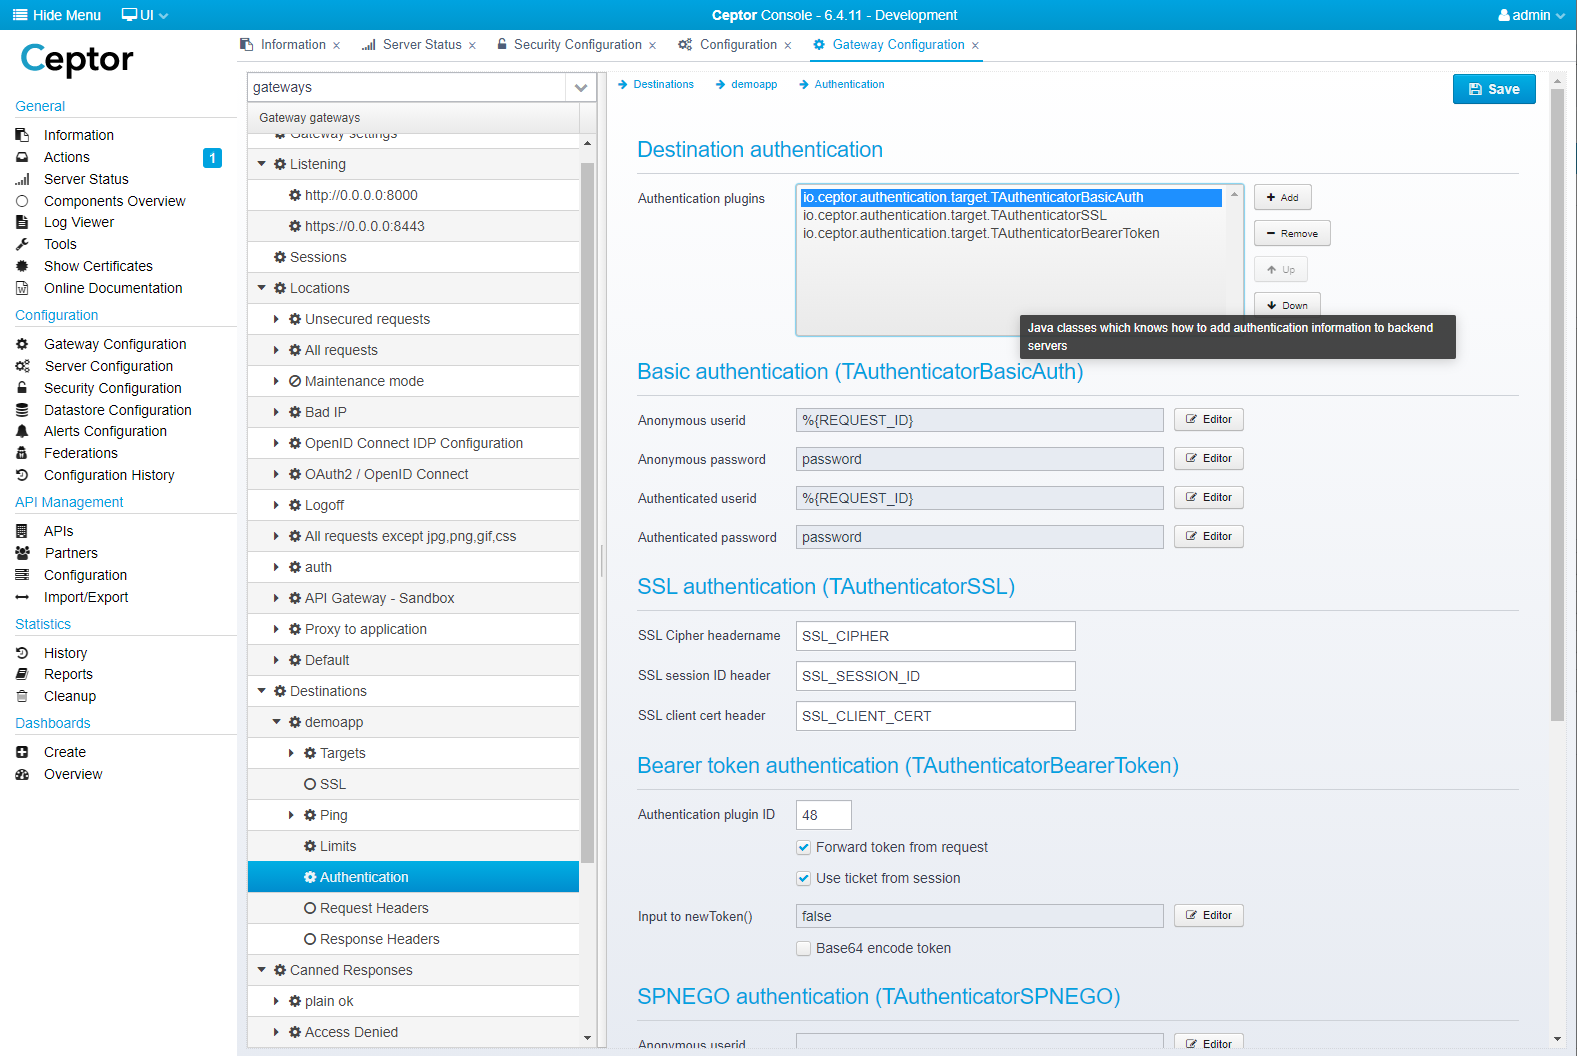
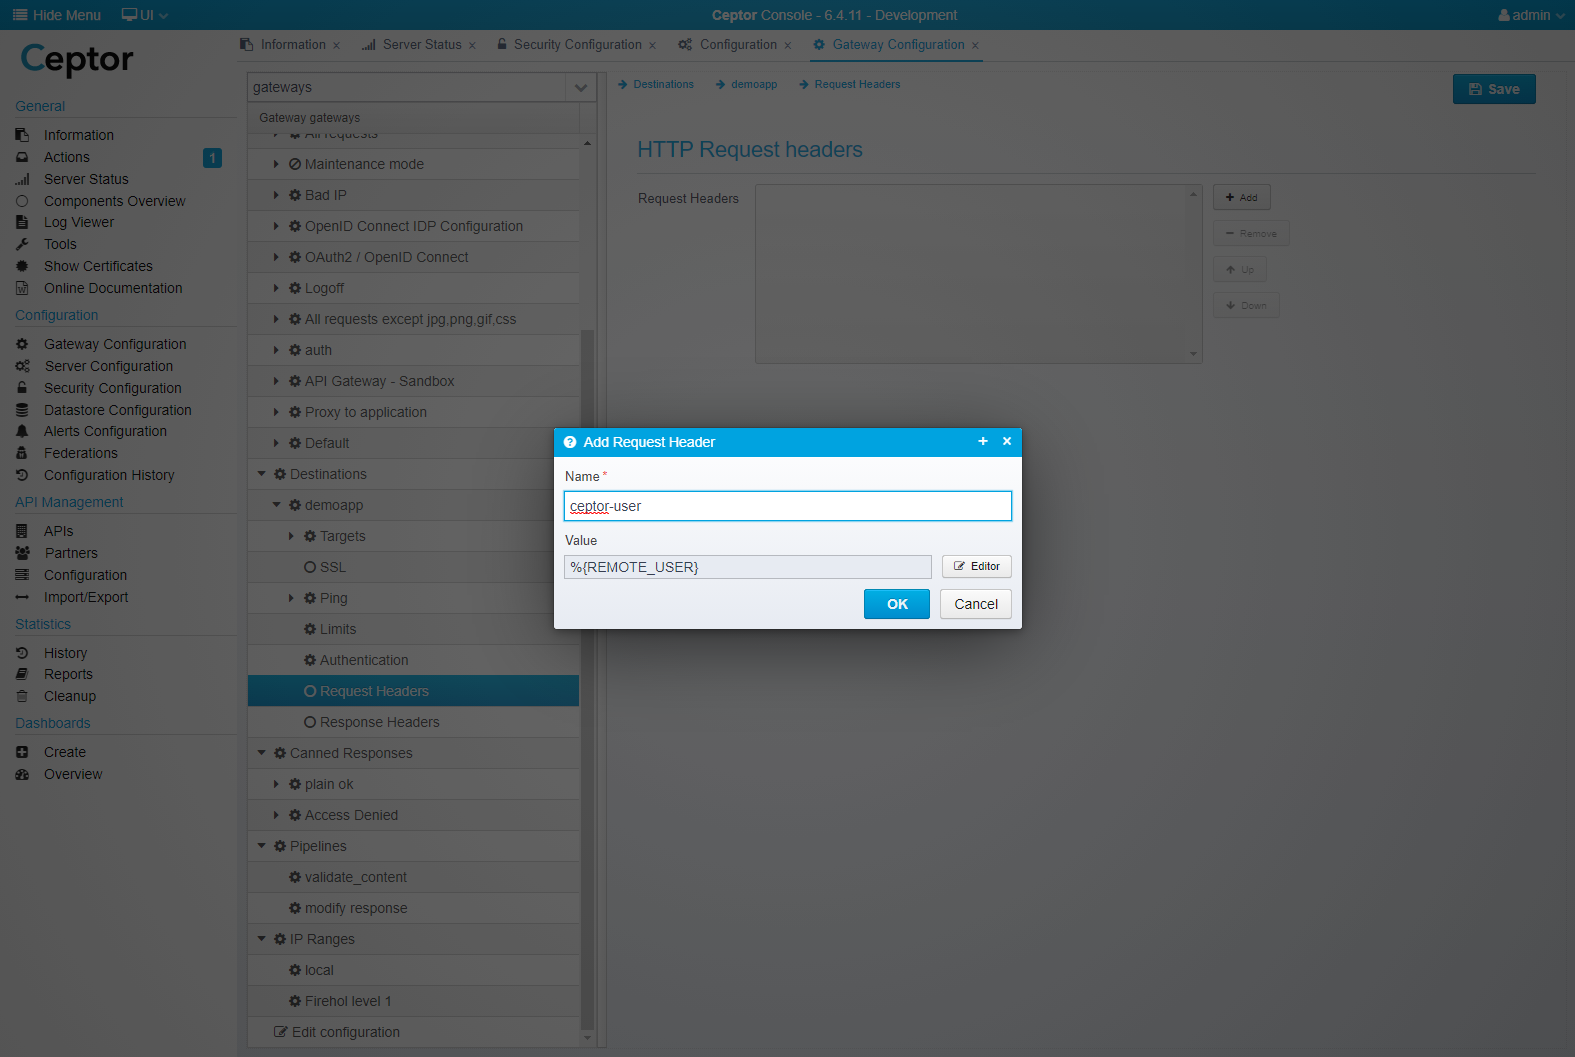
After this is done, you need to decide if you want to inform the application about who the end-user is. There are many different ways of doing this, refer to Destinations and Config - Destinations (Authentication) for details.
By default, Ceptors "session ID" is forwarded to the application using Basic Authentication along with information about SSL session between browser and Ceptor Gateway. If you do not want this, you must remove the defined "Authentication Plugins" on the "Authentication" page.
Here, you can also add custom HTTP headers with information - e.g. if you want to forward the userid of the authenticated user in an HTTP header called "ceptor-user", select "Request Headers" and add a new HTTP header with the name "ceptor-user" and the value set to "%{REMOTE_USER}"
Styling authentication pages
The HTML / Javascript / Styling pages that are used for authenticating / registering end-users
You can find more documentation on the authentication options here: Create an Authentication Application within Ceptor Gateway
Controlling what happens after login
The default action after login is to just show a brief welcome page - this is controlled by the javascript in the file /auth/js/ceptor.js which contain the following section:
/**
 * Page shown after login
 *
 * @param info Session info from /info API call
 */
Ceptor.afterLoginPage = function(info) {
    var text =
		'<p class="marginTop 25px">'+
		'<img class="ceptor-logo" src="icon/Ceptorlogo.png">'+
        '<div id="login-result" class="row">'+
		'        <div class="blue-text center">'+
        '            <h3 class="center">Welcome</h3>'+
        '           <div class="black-text center">'+
        '              <h5>Hello '+$('<div>').text(info.user_name).html()+'</h5>'+
        '           </div>'+
        '        </div>'+
        '</div>'+
        '<div class="card-panel">';

    if (!availableOTPMethods.includes("totp")) {
        text +=
        '     <span class="blue-text text-darken-2"><h6><a onclick="document.Ceptor.registerTOTPPage()">Register Authenticator App</a></h6></span>';
    }

    text +=
        '     <span class="blue-text text-darken-2"><h6><a href="/docs/4.0/examples/dashboard/">View company site</a></h6></span>'+
        '     <span class="blue-text text-darken-2"><h6><a href="/docs/4.0/examples/blog/">View intranet</a></h6></span>'+
        '     <span class="blue-text text-darken-2"><h6><a href="/">Internal mail</a></h6></span>'+
        '</div>'+
        '<div class="fixed-action-btn">'+
        '    <a class="btn-floating btn-large red pulse">'+
        '        <i class="large material-icons">menu</i>'+
        '    </a>'+
        '    <ul>'+
        '        <li><a class="btn-floating blue" onclick="document.Ceptor.registerTOTPPage()"><i class="material-icons">person</i></a></li>'+
        '        <li><a class="btn-floating yellow darken-1" onclick="document.Ceptor.logoff()"><i class="material-icons">exit_to_app</i></a></li>'+
        '    </ul>'+
        '</div>';

    $(locationName).html(text);


    var elems = document.querySelectorAll('.fixed-action-btn');
    M.FloatingActionButton.init(elems, {});
}
Here, change to your preferred action - if you e.g. you can redirect to / after login by changing to:
/**
 * Page shown after login
 *
 * @param info Session info from /info API call
 */
Ceptor.afterLoginPage = function(info) {
    window.location = "/";
}
Then requests will be proxied to the web application you changed to configuration to point after multifactor authentication has completed successfully.
Alternatively, you can present the end-user with more links like this:
Ceptor.afterLoginPage = function(info) {
    var text =
		'<p class="marginTop 25px">'+
		'<img class="ceptor-logo" src="icon/Ceptorlogo.png">'+
        '<div id="login-result" class="row">'+
		'        <div class="blue-text center">'+
        '            <h3 class="center">Welcome</h3>'+
        '           <div class="black-text center">'+
        '              <h5>Hello '+$('<div>').text(info.user_name).html()+'</h5>'+
        '           </div>'+
        '        </div>'+
        '</div>'+
        '<div class="card-panel">';

    if (!availableOTPMethods.includes("totp")) {
        text +=
        '     <span class="blue-text text-darken-2"><h6><a onclick="document.Ceptor.registerTOTPPage()">Register Authenticator App</a></h6></span>';
    }

    text +=
        '     <span class="blue-text text-darken-2"><h6><a href="/">View company inventory page</a></h6></span>'+
        '     <span class="blue-text text-darken-2"><h6><a href="/intranet">View intranet</a></h6></span>'+
        '     <span class="blue-text text-darken-2"><h6><a href="/email">Internal mail</a></h6></span>'+
        '</div>'+
        '<div class="fixed-action-btn">'+
        '    <a class="btn-floating btn-large red pulse">'+
        '        <i class="large material-icons">menu</i>'+
        '    </a>'+
        '    <ul>'+
        '        <li><a class="btn-floating blue" onclick="document.Ceptor.registerTOTPPage()"><i class="material-icons">person</i></a></li>'+
        '        <li><a class="btn-floating yellow darken-1" onclick="document.Ceptor.logoff()"><i class="material-icons">exit_to_app</i></a></li>'+
        '    </ul>'+
        '</div>';

    $(locationName).html(text);

    var elems = document.querySelectorAll('.fixed-action-btn');
    M.FloatingActionButton.init(elems, {});
}
Using Ceptor Demonstration
After the configuration changes are completed, you can now use Ceptor. Point your browser towards http://localhost:8000/ or https://localhost:8443/ (or use the correct port if you changed this in the configuration)
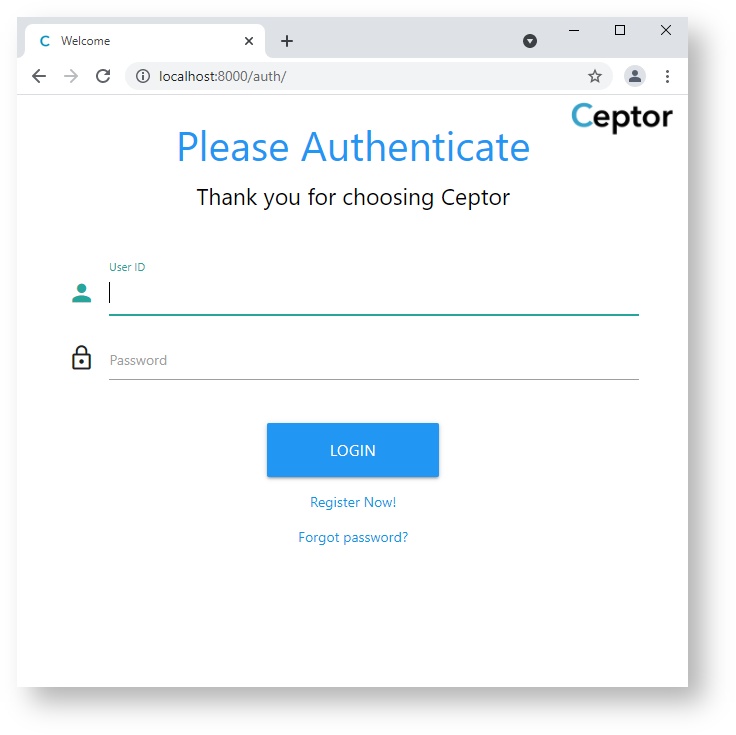
Here, start by registering a new user.
Once the user is registered, you can add the Mobile Authenticator App (such as Google Authenticator, Microsoft Authenticator or others supporting the TOTP standard), by registering it, scanning the QR code and entering the 6 digit code.
View this video clip for info on authenticating using MFA:
and this video shows how to register a mobile Authenticator App.
Using Radius Server
TODO: Add screenshots/video of radius/VPN client authenticating.
Technical information
In this default demonstration, the user is saved in a local demonstration database based upon Apache Derby - several other databases are supported such as Postgres, MySql/MariaDB, SQL Server, Oracle or DB2. For more information about this, refer to: Databases in Ceptor and Ceptor User Administration Server
There are many other options available - e.g. your users might be pre-registered in an Active Directory server where you also store the phone number, email and TOTP shared secret, or you might have a combination where you nee
Related content
© Ceptor ApS. All Rights Reserved.