Adding a New Application
- Kim Rasmussen
- Jesper Nielsen (Unlicensed)
- Kim Rasmussen (Unlicensed)
When you have an existing setup, and you need to add another application so it is protected by Ceptor, the following section shows you what to do in order to obtain this.
Overview
How to add a new application differs slightly, depending on that applications needs, you have 2 choices;
- Application without any installed Ceptor Agent and/or application server plugins.
- Application with Ceptor Agent / Application Server Integrations
When adding an application without a plugin, you only need to change the configuration for Ceptor Gateway - but there are a few additional steps required for applications needing a Ceptor Agent as well.
Applications without an Agent are usually fed information about the users identity in HTTP headers, but applications with an Agent and Application Server Integrations are only fed with the current session ID within the HTTP headers, and they then use the Ceptor Agent to obtain information about the authenticated user, his groups, attributes etc. and feed them into the JEE Subject (or IIS Principal for .NET based applications using Ceptor Agent for .NET).
Adding an application in Ceptor Gateway
To add a new application in Ceptor Gateway, you need to follow these steps:
- Create a Destination within the Gateway configuration
- Add one or more Target servers to the Destination.
- Setup Destination Authentication for the Destination.
- Create a Location within the Gateway configuration, proxying the request to the destination servers.
Creating a destination:
Within Ceptor Console, go to Gateway Configuration and select Destinations - here, you can add a destination


More information here: Gateway Configuration - Destinations
Adding target servers:
Once the destination is added, you need to add one or more target servers - each server participates in a cluster that Ceptor Gateway loadbalances between. You can choose stickiness settings and configure things like individual SSL settings or limits on concurrent requests per server.


More information available here: Destination Target Servers
Setup destination authentication:
Once we have added a destination and some servers, we need to decide how to forward information about the authenticated user to the application, so it use this information for authorization purposes.
The following standard destination target authenticator plugins exist:
- io.ceptor.authentication.target.TAuthenticatorBasicAuth
This plugin can perform basic authentication against the target server - it can supply both a configured value, pick one from the session, or it can forward the session ID of the authenticated user as userid. This can be configured differently for anonymous and authenticated users. Often, this plugin is used to make it easier to integrate with various application servers, e.g. when using WebLogic SSPI plugins, PP Agent within weblogic is triggered by the session ID being transmitted in the basic authorization header as if it were a userid. - io.ceptor.authentication.target.TAuthenticatorSSL
Allows adding SSL certificate information to the request HTTP headers - e.g. if user was authenticated using an SSL client certificate, the used cypher, SSL session ID and client certificate can be added as HTTP headers. Note that SSL certificate authentication is not done by this plugin, since it would require access to the end-users private key - instead, the information is forwarded in HTTP headers.
If you need to use a specific SSL client certificate in the communication with the target server, you can set that up in the SSL settings in the destination / target server configuration. - io.ceptor.authentication.target.TAuthenticatorBearerToken
Allows forwarding of a bearer token obtained from the client to the target server, or creation of a new token/ticket which can be sent in a bearer token to the target server. - io.ceptor.authentication.target.TAuthenticatorSPNEGO
Allows using SPNEGO/Kerberos authentication towards the target server - can either user authenticated users userid/password, or a configured one or one taken from other state variables within the session. - io.ceptor.authentication.target.TAuthenticatorLTPAToken
Allows creation of an LTPA token which is sent in a cookie to the backend application server. Enables easy integration with various IBM products supporting LTPA authentication.
Note that more than one type of plugin can be used at a time, allowing to deliver e.g. both a bearer token and SSL client certificate to the target servers.
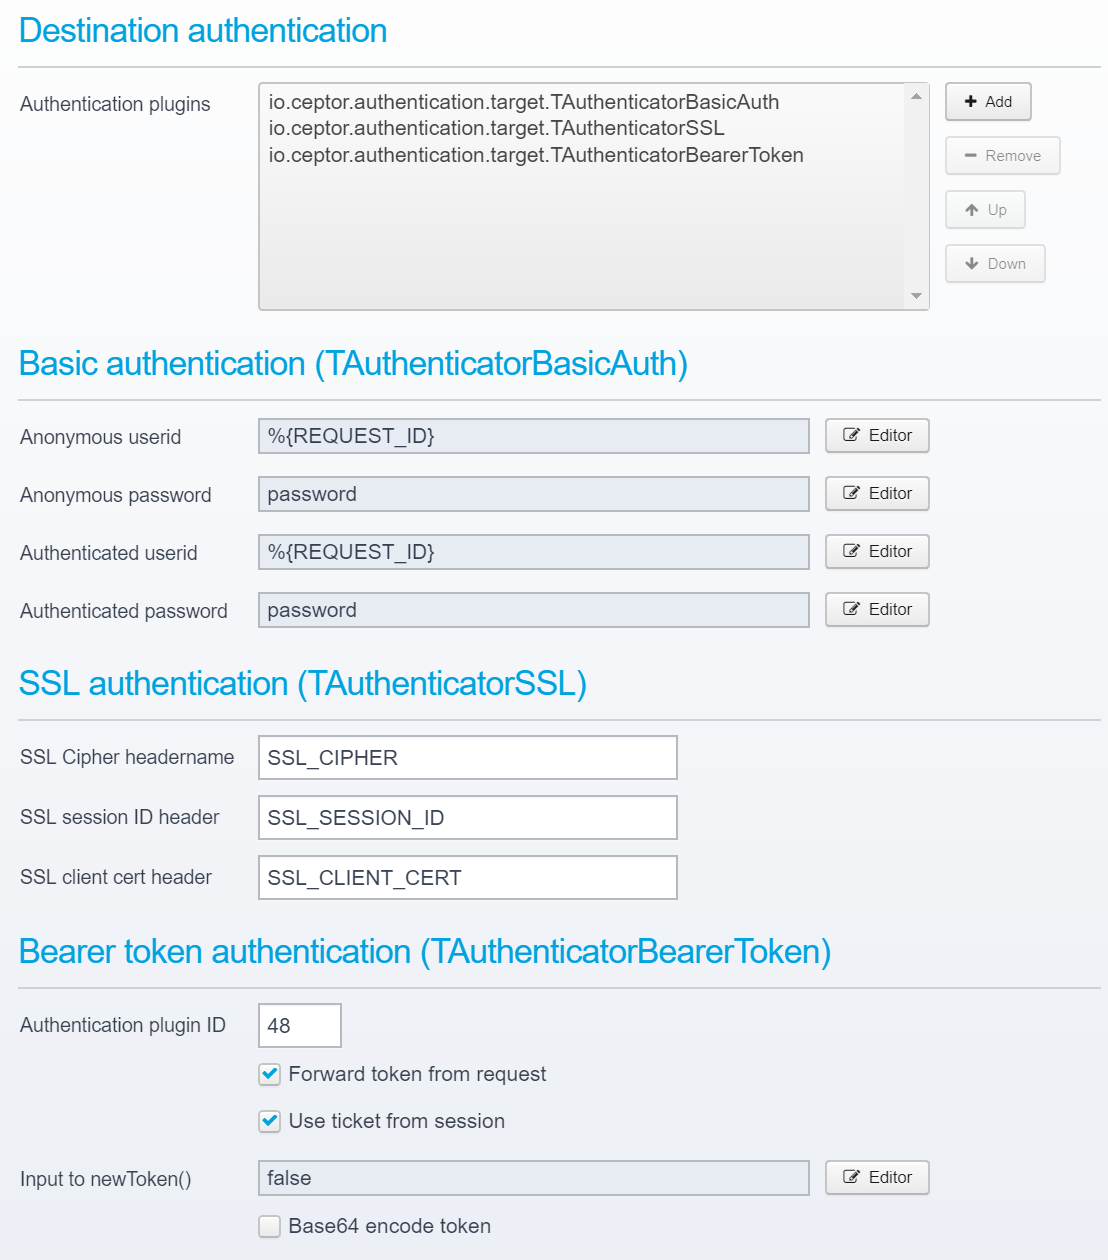
This example below adds basic auth, SSL and bearer token.
In the basic auth in this example, the Ceptor Request ID (see Sessions ) is sent as userid, with the password "password" - this allows an Application Server Integrations plugin in more or less every type of application server to intercept the request and use the provided session ID to extract information about the authenticated user.
This is a "trick" which allows easy integration with e.g. a Jetty server since it calls the registered authentication plugins to give them a chance to process the information.
It is entirely up to the individual requirements of the application on the target server which information to add, and what to send - it is also possible to use this to map credentials, e.g. let a user authenticate using NemID or SSL Client certificate - but exchange it to a userid and password which is then provided using SPNEGO/Kerberos to the application server.
The input to these values, e.g. userid can originate from a script or macro - see Scripts and Macros for more information.
More information about this subject here: Destinations - Authentication
Creating a location:
Now, you have a destination, some target servers and a method of forwarding user identity to these servers - but you still need to tell the gateway when to send the request to a server.
You do this from a Location
There are other options, such as using Pipelines and Tasks and Task - Proxy to Destination or Task - Call Service / URL- but that is a more advanced topic.
Create a new location by going to the Gateway Configuration, select Locations and click Add.
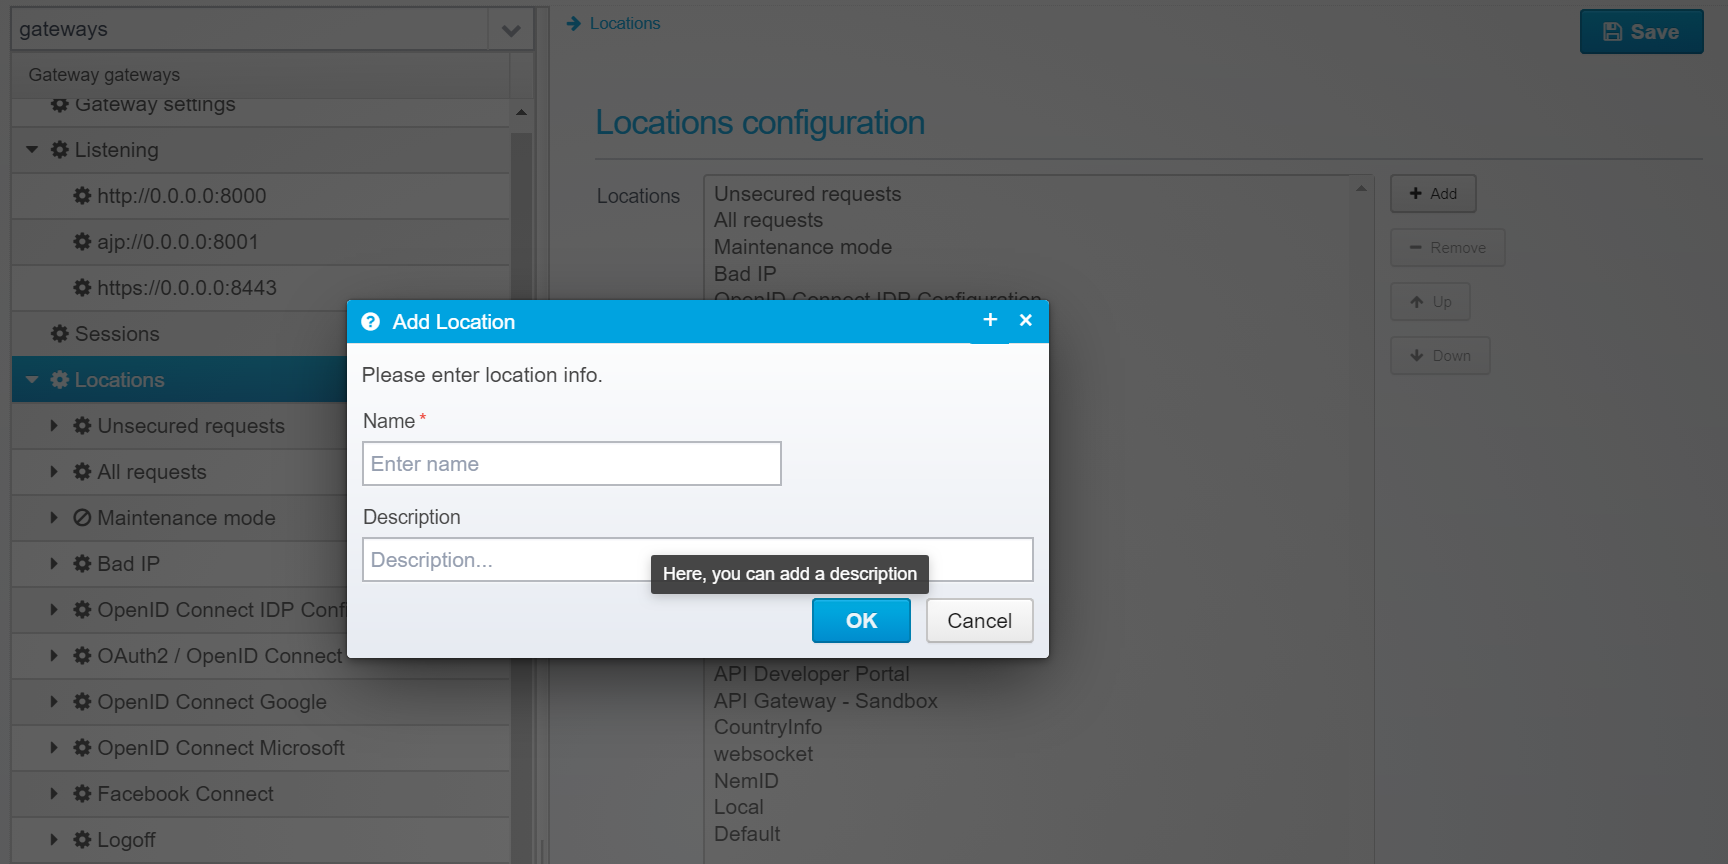
Type in a name and description, and add it - once added, save and go to location configuration.
The order of locations matter - they are executed in order starting with the top one - if its conditions match, but it takes no action, any child locations are executed until it runs out of children - in that case execution continues with the next parent in the chain.
Processing stops when a location terminates request handling by either sending a response, serving an API, serving static resources or proxying the request onwards to a destination.
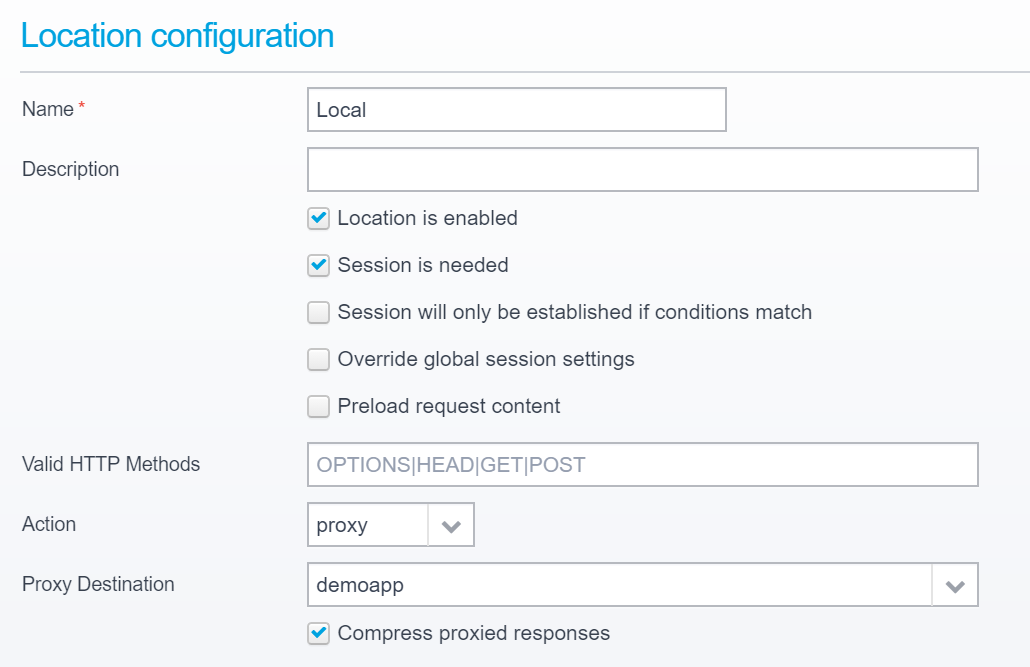
Within the configuration for the specific location, you should set the action to "Proxy" and select the correct proxy destination.
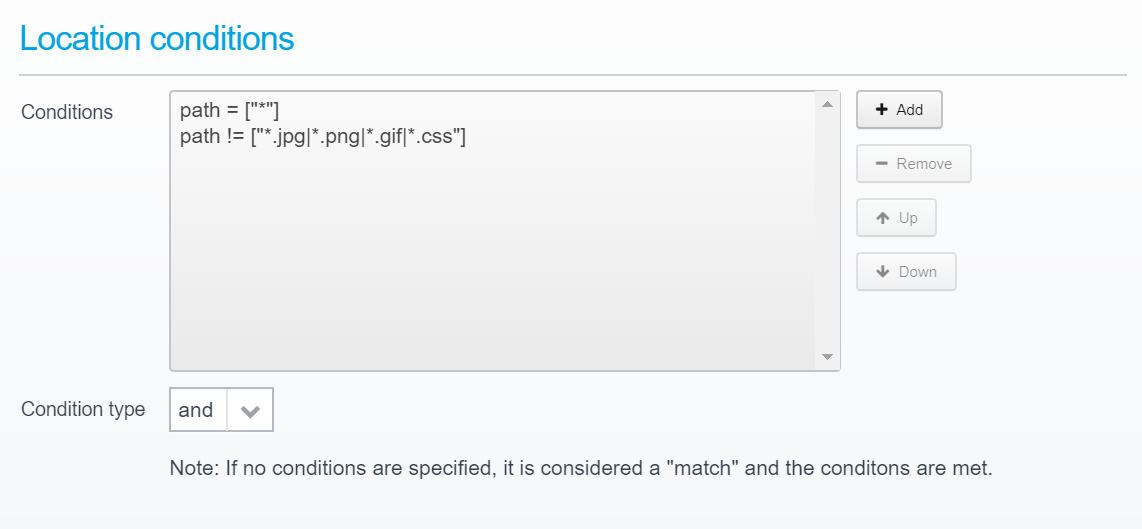
Do not forget to set the conditions under which the location is triggered - conditions include hostname, path, query parameter, userid, group, remote IP, geoip etc. allowing you to decide exactly under whichconditions you want to proxy a request to the newly added destination server.
Here, you can view which conditions types are available: Locations - Conditions
Much more information about locations available here: Locations and Config - Locations
Adding an Agent / Application Server Integration
An Agent requires a connection to the Ceptor Configuration Server - when starting up, it establishes the connection to it, retrieves its configuration, and then proceeds to connect to the Ceptor Session Controller.
To be able to talk with the Ceptor Configuration Server, the Agent needs a name of a "server" identifying the application server it is embedded within and its configuration - this is a logical name, e.g. "webserver1" which needs to exist in the configuration.
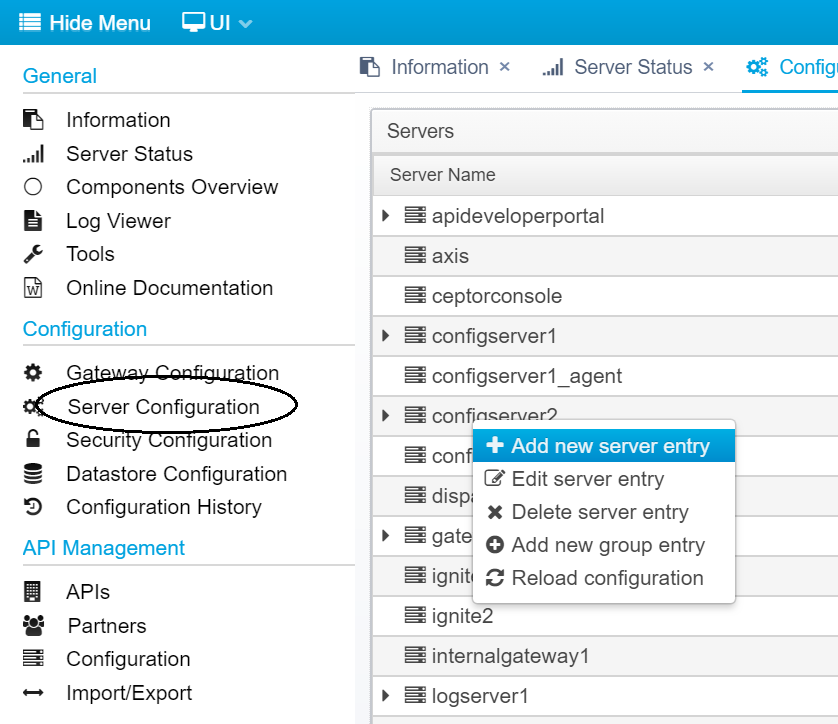
Within the Ceptor Console, go to Server Configuration, then right-click and select "Add new server entry"
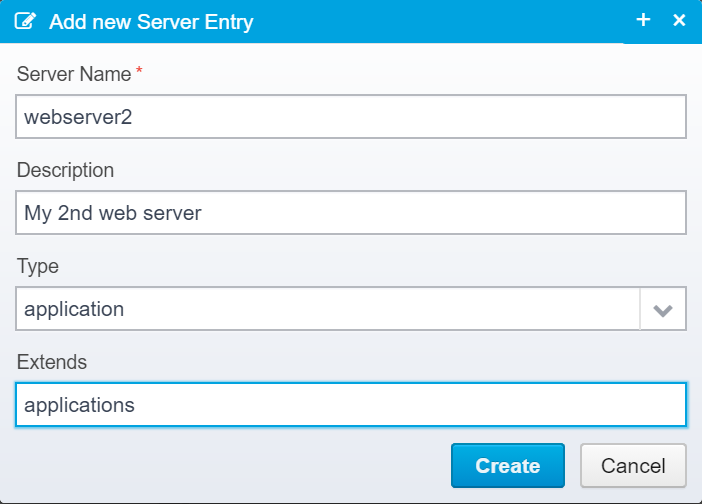
Type in the name of your server, an optional description, and select "application" as the type - also, you can allow it to "extend" from existing configuration - e.g. "applications" is an existing configuration entry in Ceptor's default configuration which contain generic settings shared by all applications.
If there are any settings you wish to override from the inherited configuration entries (from extends), just type in the name and value and it will override the "parents" configuration for this server entry.
It is possible for multiple applications to "share" a server name, meaning it is possible to use the same name for e.g. 10 instances of a server, but this is not recommended.
The downside of using the same name, is that you cannot separate them from each other in the Server Status view - and statistics for all of them will be bundled together when saved - for this reason alone, it is better to separate them.
If you decide to do it anyway, at least consider giving each agent instance its own alias name (see Ceptor Agent for Java for info on how to do this).
Finally, Commit
Finally, commit the configuration changes by clicking on "Pending configuration updates" where you can view and verify the differences before committing - once committed, the changes take effect immediately.

© Ceptor ApS. All Rights Reserved.