Integrating with IBM WebSphere
- Kim Rasmussen
- Kim Rasmussen (Unlicensed)
Introduction
Ceptor is an entire security solution that protects portals and application servers, regardless of the communication type used, be it JSP, Servlets, EJB or other type of communication. Ceptor can provide Authentication and Authorization checking on all resources, as well as provide secure communication clients and servers.
Any number of web servers, application servers or other types of servers can be integrated, and used to create personalized content and session sharing between all applications, so users experience single signon with access (depending on authorization of course) to all applications available in your portal.
This document describes how to integrate Ceptor with IBM WebSphere Application Server 6.x
Overview
The WebSphere Application Servers security can be extended by creating a Negotiate Trust Association Interceptor (NTAI) plugin. WebSphere will let the plugin authenticate the user based on the contents of the HTTP request.
The Ceptor NTAI plugin currently supports 2 different methods of authenticating the user.
- If the request contains a PP session ID (which is does if the request passed through the Ceptor Gateway / Dispatcher), and if the user within the session is authenticated in Ceptor, then the NTAI plugin will authenticate the user to WebSphere as well, creating a new Subject with the users userid and groups within.
- If the request contains a digital certificate (SSL client certificate) then the NTAI plugin will use that certificate to create a new PP session, and call the Ceptor server to authenticate the user. After authentication a new Subject is created containing the userid and usergroups from the PP session. In addition, the PP session ID is placed in the HTTP session, so it can be retrieved and used by the application if required.
Installation of Security Providers and Configuration
Installation is relatively straightforward, you will need to copy the following .jar files to the {WAS_INSTALL}/lib/ext directory, where {WAS_INSTALL} is WAS' installation directory, e.g. "C:/WebSphere/AppServer/lib/ext".
- CeptorWAS6.jar
- CeptorAgent.jar
- log4j.jar
Additionally, you will need to tell the Ceptor Agent how to locate the configuration server, and you will also need to provide a log4j.properties file with configuration for log4j.
There are basically 2 ways of doing this, one using system properties and another by creating configuration files and placing them within a .jar file (e.g. ppconfig.jar) in the {WAS_INSTALL}/lib/ext directory.
To use system properties, add the following properties to the servers startup parameters:
- –Dserver.name=webserver1
- –Dconfig.servers=ppserver1:21233,ppserver2:21233
- –Dlog4j.configuration=file:///xxx/yyy/log4j.properties
Here, webserver1 should be replaced with the server name that correspond to a server listed in the Ceptor servers configuration. Additionally ppserver1:21233 and ppserver2:21233 should be replaced with the list of Ceptor configuration servers and port numbers… and of course +file:///xxx/yyy/log4j.properties+ needs to be replaced with an URL to a real log4j configuration file.
If you prefer to use configuration files instead of system properties, create 1 file called ptserver.properties with the following 2 lines in it:
server.name=webserver1
config.servers=ppserver1:21233,ppserver2:21233
…replacing the defaults with the the real values as explained above.
Then create a new .jar file, config.jar and zip ptserver.properties and log4j.properties into it, then you can place it together with the other .jar files in {WAS_INSTALL}/lib/ext.
Now the files have been installed, it is time to configure WAS to use the new NTAI plugin.
First, enter the WebSphere Administrative Console, and turn on security.
Set the Active Authentication mechanism to LTPA, and press Apply. 
Next, select Authentication mechanisms -> LTPA – in there, enter a password for protecting the LTPA keys – refer to WebSphere's documentation for more details on what LTPA is. 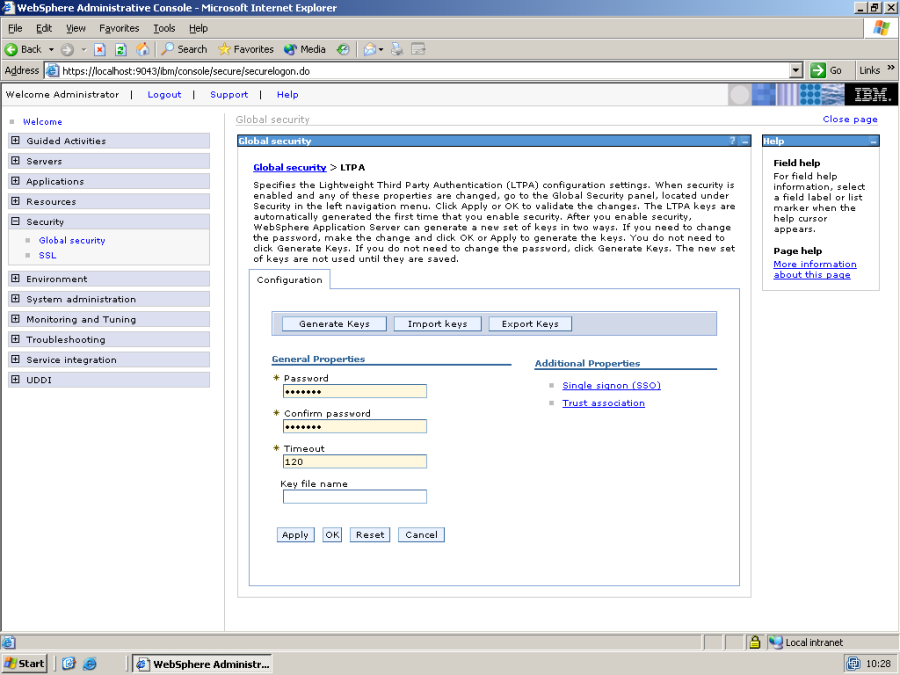
After entering the password, click on "Trust association", and the following screen should appear: 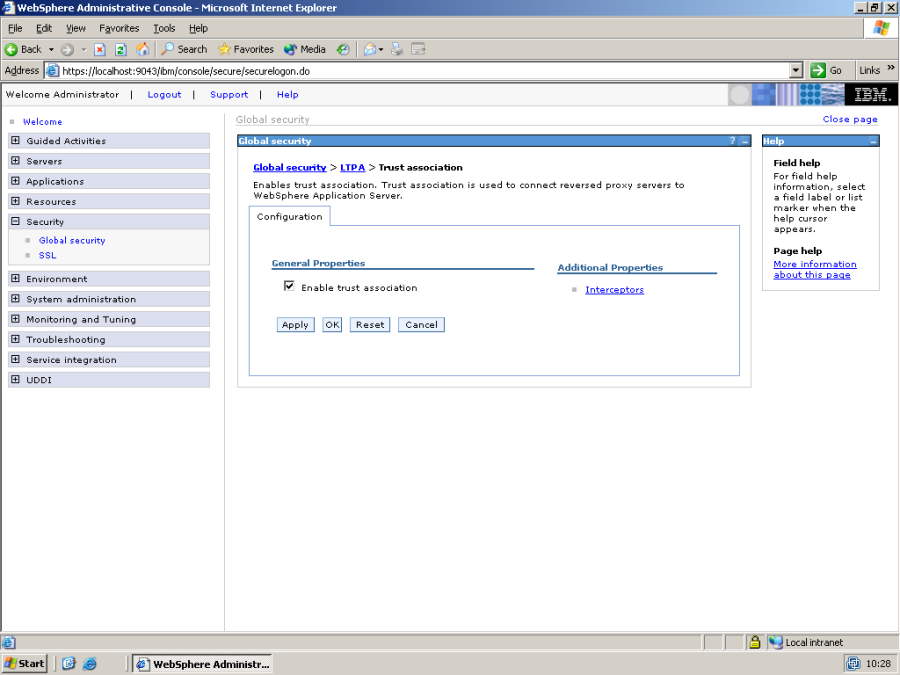
Make sure that "Enable trust association" is checked, and click on Interceptors. 
Here is the list of currently installed NTAI plugins – click on New, and add the plugin dk.itp.websphere6.ntai.PortalProtectTAI to the list. 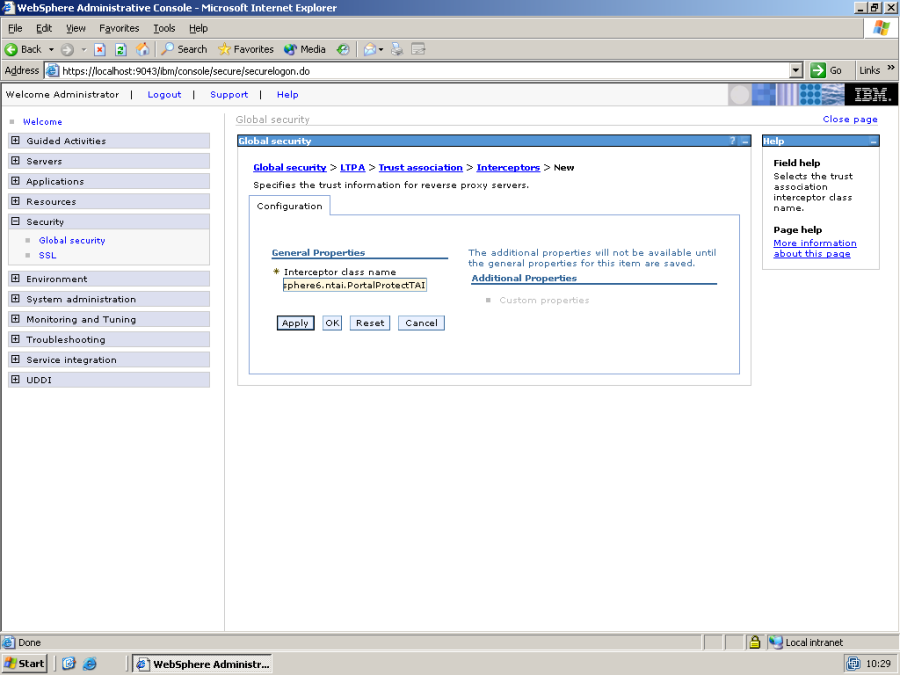
Click ok, and you should get something like this: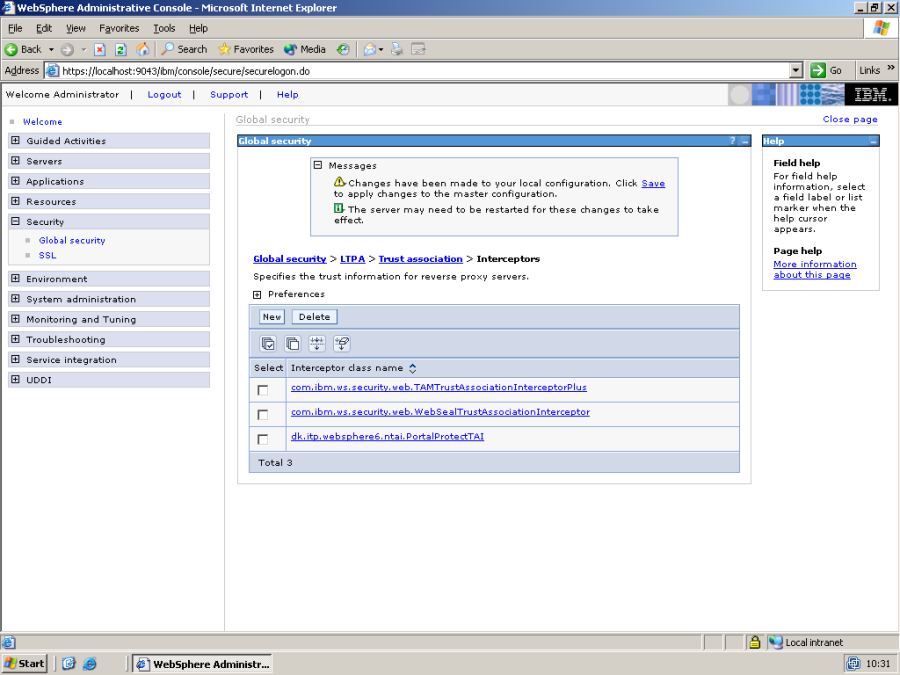
Now go back to the main "Global security" page and ensure that "Enable global security" is checked. 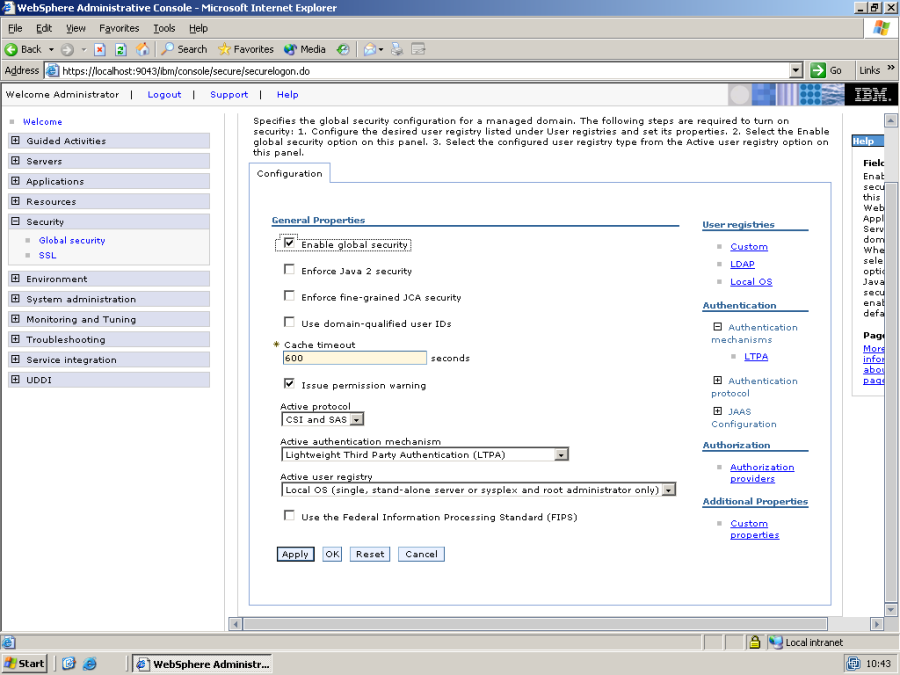
Note that in order for WebSphere's global security to work, an active user registry must be selected – users logging in to the administration console, and users authenticating to WebSphere using userid and password will be authenticated by WebSphere against the selected user registry. This means, that if you e.g. select "Local OS" then you must login to the administration console using a userid/password of an administrator on your local machine.
Remember to save the configuration to the master config and restart WebSphere Application Server after changing the configuration.
OPTIONAL CONFIGURATION
When a TAI is configured in WebSphere, all the different WebSphere processes use it, including the Deployment Manager and the Node Agents. If you want to avoid these servers connecting to the Ceptor Server, you can define a system property from the called "ppdisabled" and set it to true – simply add "-Dppdisabled=true" to the JVM settings for the Deployment Manager and the Node Agents to disable the TAI plugin for these JVMs.
Related content
© Ceptor ApS. All Rights Reserved.